Hello everybody, I hope you are having an amazing day today. Today, I’m gonna show you how to prepare a distinctive dish, hyderabadi kalyani dum biryani. One of my favorites. For mine, I am going to make it a bit unique. This will be really delicious.
Hyderabadi Kalyani Dum Biryani is one of the most well liked of current trending foods on earth. It’s enjoyed by millions every day. It’s simple, it’s quick, it tastes delicious. Hyderabadi Kalyani Dum Biryani is something that I have loved my entire life. They’re nice and they look fantastic.
Hyderabadi biryani is one of India's most famous biryanis,some say biryani is synonymous with Hyderabad. The crown dish of the Hyderabad. Chicken marinated with special spices and cooked along with basmati rice.
Guide to Prepare Hyderabadi Kalyani Dum Biryani
To get started with this recipe, we have to prepare a few components. You can cook hyderabadi kalyani dum biryani using 24 ingredients and 7 steps. Here is how you can achieve it.
Ingredients
The ingredients needed to make Hyderabadi Kalyani Dum Biryani:
- Make ready 1 1/2 kg Basmati Rice
- Get 2 kg Beef boneless
- Get 1/4 cup Ginger garlic paste
- Prepare 1 tsp Turmeric powder
- Take 2-3 tbsp Salt or to taste
- Take 3-4 tbsp Red Chilli powder
- Get 5-6 Green Chillies slit
- Make ready 2 tsp Garam Masala
- Prepare 2 small bunches Coriander Leaves finely chopped
- Prepare 2 bunches Mint Leaves
- Make ready 1/2 kg Yoghurt
- Make ready 750 ml Oil
- Take 1 kg Onions thinly sliced
- Prepare WHOLE SPICES -
- Prepare 12-14 Cloves
- Take 1 tbsp Caraway Seeds
- Get 3-4 Cinnamon sticks (1 inch)
- Make ready 6-7 Cardamom pods
- Take 6-7 Green Chillies whole
- Get 1 Lemon medium sized
- Get as required Water for cooking Rice
- Prepare 1 tbsp Ghee
- Take 7-8 Saffron strands
- Take 1/4 cup Milk
Subscribe to our Youtube ChannelClick here to Subscribe our Youtube Channel and stay updated with our latest. Learn Hyderabadi Dum Biryani from scratch. What type of cookware you need, How to choose meat and marination process to make the meat tender and melting in the mouth, how to make rice fluffy, moist yet separated, How to layer meat and rice - all things together. A perfect combo pack to make.
Instructions
Steps to make Hyderabadi Kalyani Dum Biryani:
- Marinate Beef with all the ingredients including the Yoghurt except the whole spices. Add the chopped Coriander and Mint too. Do not forget to add the raw Papaya paste too along with the Lemon juice.
- Keep enough water to boil for the rice. Soak rice only until the water starts boiling. That means, wash and soak Rice just as you keep water for cooking it. As soon as it starts boiling, add soaked Rice, whole spices, some chopped Mint and Coriander leaves to it. Also add a few Green Chillies.
- Remember to boil it for about 20 minutes or just until it vigorously starts bubbling. The grains should be firm. Do not stir it hard. Otherwise they tend to break. Check if they can be easily crushed. This is the right time to switch off the heat. The rice needs to be about 90% cooked. Firm and not mushy. Drain the water and keep it aside.
- Meanwhile deep fry the sliced onions. Spread them on a plate and after about 5 minutes, crush them with your hands and add to the marination. Also add the Oil in which they are fried after it cools down. Mix well.
- Now comes the final part of slow cooking (called as dum). Layer the rice and meat as per your choice, only thing to taken care of is that the top most layer should be that of rice. Sprinkle some Saffron soaked milk on top. Add a generous dollop of ghee on top (optional) and cover it well either by an aluminium foil or a wet thick cotton cloth sealing the corners of the lid.
- I always prefer an aluminium foil. For the first 15 minutes, keep it on a high heat, rotating the vessel every now and then. After 15 minutes, lower the heat and let it simmer for about 30-35 minutes. Turn off the heat after the stipulated time and let the Biryani sit for sometime.
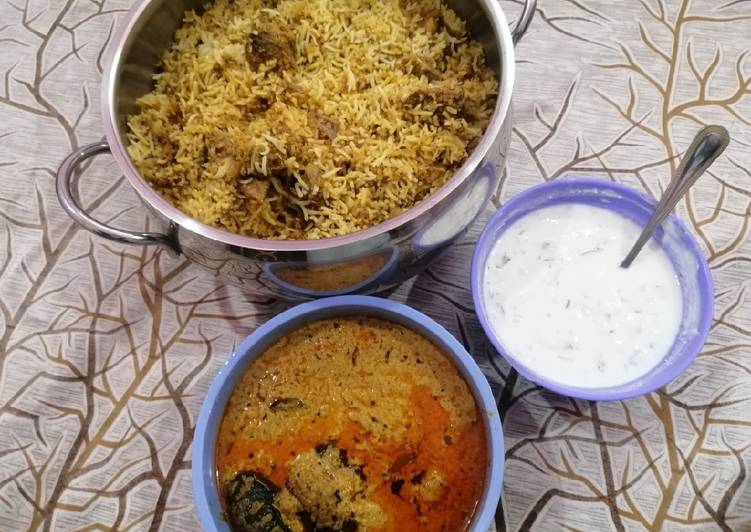
- Serve hot with Burhani raita or plain curd and Baghare Baingan alongside. Mirchi ka Saalan is also a lovely combination that one can consider. Enjoy!
This hyderabadi veg biryani or hyderabadi vegetable biryani recipe is a slowly cooking method where the preferred vegetables are stir fried and mixed with all the spices to make a sabzi masala, mixed with half cooked rice and placed on dum and this biryani is usually referred as tarkari ki biryani or sabzi. Reviews for: Photos of Hyderabad Dum Biryani. As a lover of Kalyani beef biryani, Hyderabad's less famous but much loved other biryani, I wonder what Unlike the more famous dum ki biryani, in which the meat is chicken or mutton, Kalyani uses beef or buff "Hyderabadi biryani" is available in restaurants while "Kalyani biryani" is served at. Hyderabadi biryani is a South Indian dish consisting of basmati rice, goat, mutton, or It is said that Hyderabadi biryani's richness of flavor is due to the unique process of cooking raw rice The special cooking style, known as dum, is believed to have come from Persia during the Mughals' regime in India. Folks often mistake Kalyani biryani to be a cousin of the popular Hyderabadi biryani but this comparison is neither fair nor accurate.
As simple as that Easiest Way to Make Hyderabadi Kalyani Dum Biryani
So that’s going to wrap it up for this special food hyderabadi kalyani dum biryani recipe. Thank you very much for your time. I’m confident that you can make this at home. There is gonna be more interesting food in home recipes coming up. Don’t forget to bookmark this page in your browser, and share it to your family, friends and colleague. Thanks again for reading. Go on get cooking!
Print this page